

So You Wanna Grow Mushrooms?
WIREGRRRL'S SHITTY GUIDE TO MUSHROOM CULTIVATION
Jump to section!
So, you want to learn about growing mushrooms? You've come to the right place bucko.
Growing mushrooms may seem daunting at first, with a little bit of reading it's actually a fairly simple process and you can get started on a very rewarding hobby in no time at all! The great upside with mushroom growing in comparison to growing plamts is the turn around time from start to finish is much, much quicker. As a result, your rewards, whether culinary, medicinal, or otherwise, come much quicker, but also your failures don't set you back as much.
So don't be afraid to fail! If you don't get contamination, that's awesome! but if you do, don't worry, there's always next time.
To demystify the process, it can be boiled down to a few steps.
-
Inoculation: Inoculating a grain with the fungus of choice
-
Spawning to bulk: Breaking up that grain into a substrate (Optional: skip if you're fruiting from the mycelial cake)
-
Fruiting: Inducing the right conditions for the mycelium to fruit; to make yummy mushrooms
As you go through this, remember:
SANITISE
SANITISE
SANITISE
You can never sanitise enough.
Isopropyl alcohol
EVERYWHERE.
Mushroom cultivation is a process of risk management. The less you clean, the more likely you will get contamination. Is it possible to get a good grow without sanitising properly? Yes! Is it possible to get contamination even if you sanitise incessantly? Also yes! However, you are more likely to get contamination if you don't sanitise, so rather than risking it, it's better to be thorough and be clean.
 Inoculation Methods
There are various ways to innoculate your grain. The main ways are as follows:
Spore Syringe (SS)
Pretty self explanatory. Its a syringe filled with purified water that contains the spores of your desired fungus distributed throughout. Spore syringes are one of the least efficient ways of inoculation because of the fact you are starting with brand new and random mushroom genetics. Moreover, the actual growing process takes longer as the spores have to find each other and do their spore things to start growing mycelium. These two factors result in grows taking longer, and being more varied and inconsistent with their fruits. However, it's always an option if alternatives aren't available.
(Another positive of spore syringes is that spores don't contain any illicit compounds and as such are completely legal to own and purchase :3 )
Liquid Culture Syringe (LC)
A liquid culture is basically just mycelium suspended in nutritious water. The advantage of this over an SS is that you already have a living culture (with potentially well isolated genetics) that you're just spreading throughout your grain, so half of the work is pretty much done (exaggerating but you get my point). It's faster, less likely to contaminate, contain good genetics, and most importantly, EASY TO MAKE MORE OF!
For most commonly cultivated mushrooms youre likely to be able to by an LC, so if you're able to get one, go for that over an SS.
Agar to Grain Transfer (A2G)
Agar to grain transfer involves cutting out a piece of inoculated agar to your grain of choice. Much like liquid culture, it skips the spore stage and allows you to inoculate with isolated genetics and is easy to make more of. It takes longer than liquid culture as it's a solid chunk of mycelium rather than a liquid that can spread throughout your grain, but it's still good at its job.
At some point you'll want to make agar plates toclone some spicy genetics.
Grain to Grain Transfer (G2G)
Grain to grain transfer involves taking some already inoculated grain from another jar and inoculating a new jar with it. This is only an option if you are already growing the specific fungus you want. This is very much a "hey I might as well" kind of technique.
Grain Spawn
There is some consideration to be had when choosing what grain (if at all) you want to inoculate and use for your grain spawn. Much of it comes down to availability but some grains need to be treated differently to others.
Some mushrooms are able to be grown in other ways, without the use of grains. You can inoculate logs for some mushrooms like oyster and shiitake mushrooms for example (oysters can be grown using straw as well). The mushroom world is big and wide with many different ways to grow them, all of em with their own little quirks, so here I'm going to be focusing specifically on grain as it's the most accessible way of growing mushrooms (and it's also the way I actually know anything about).
The biggest considerations for what grain you choose are structure, hygeine, and accessibility.
When fully inoculated, some grains are more difficult to handle as they can get mushy, while others are more rigid and allow for easier handling. However, some of these grains take more preparation, or require more thorough sterilisation methods that might not be available to you. You have to choose what grain you want to use based on these factors.
The main grains used by people are:
- Brown/Wholegrain Rice
- Popcorn
- Rye
- Wheat Grain
- Barley
- Millet
- Bird Seed
Brown/Wholegrain Rice
Brown/Wholegrain rice is pretty popular among hobbyist growers. It's widely available, easy to get, and easy to prepare. The downside to brown rice is it can become mushier than some of the other grains. However it's still usually perfectly manageable. Emphasis is placed on it being brown rice is that, while it is mushier than other grains, it is still manageable. Wholegrain rice has its whole structure intact which gives it the strength to not fall apart while being eaten by the mycelium. If you try to use white rice the whole thing becomes mush, so don't use white rice please god.
While brown rice is what most sites mention, any wholegrain will do, such as red cargo rice.
Brown Ready Rice ( Uncle Ben Tek)
An offshoot of using brown rice is Uncle Ben Tek. This method is particularly popular in recent times because it allows you to skip the entire sterilisation stage of the inoculation. It's Ready in just 30 Seconds™ for more than just cooking. The bags already come sterilised so all that is required is preparing the bag for proper air exchange, and inoculate. This is handy for beginners who may be scared of spending a large amount of money initially.
There are downsides to this method however. Firstly, is difficulty in seeing progress. The bottoms of these ready rice bags are usually transparent, but it only gives you partial visibility so seeing progress is pretty difficult. Moreover there is a LOT of plastic waste with this method, especially if you do larger grows.
As already covered, it should be BROWN rice bags, not white. As well as that it should be plain. Mushrooms don't care about taste, and any additives are going to be useless at best, or attract contamination at worst. Get plain brown rice bags.
Popcorn
Structurally, you're golden with popcorn and it will be very easy to handle. Mushiness begone! However, it's a very large grain which means there's less places for the mycelium to grow off of, and the distance between grains is larger, both of which will slow down the colonisation. Some people report very fast growth so take it with a grain of salt. Popcorn can also get costly, but it can be found all over the place.
Rye
Rye is a great choice as it retains water wall, is nutritious, and doesn't get mushy after colonisation. It's an overall great grain, but the issues come with accessbility and preparation. It is not as readily available as some other grains and can be hard to come by. As for prep, we move into the non-directly culinary grains like rice and popcorn, a lot more of that prep is needed. Since it's not meant to be eaten off the bat, this grain will be contaminated with wood chips, dead bugs, all sorts of nasty shit you don't want in your grain spawn, so you will have to rinse your rye thoroughly a few times.
Wheat Grains
Wheat grains are in a similar boat to rye, except they hold less water and get mushier. However they're still a great choice. The prep is exactly the same as rye.
Barley
Again, similar vibe as wheat and rye. It's the worst out of the three as it gets the mushiest.
Millet
Under the same logic as using wholegrain rice, the millet should be UNHULLED. Because of it's small size, it offers a lot of surface area for the mycelium to grow and shoot off of, but because of how small it is, it's often mixed in with other grains rather than used on its own.
Oats
Another good option. Again, it has to be unshelled.
If you're thinking of using the stuff you'd use to make porridge, just don't. Please.
Bird Seed
Bird seed is cheap and widely available from garden centres and hardware stores. This comes at the cost of the hydration being uneven and inconsistent and not all mushrooms particularly taking to it. While it is an option, it's more of a last resort kinda deal.
Preparing Grain
There are multiple ways of prepping your grain, depending on what you choose.
Wholegrain Rice:
-
You cook it as you would normally, then slap it in the jar for sterilisation.
All the other grains:
-
Rinse thoroughly several times to get rid of gross stuff (exlcuding popcorn if you're using food grade popcorn).
-
Soak for 12-24 hours in water.
-
Strain it and give it a quick rinse.
-
Add to boiling water and simmer. For popcorn, you want to simmer for 40ish mins. For the others, around 15 mins is good. The grain has to be come fully hydrated, but NOT falling apart. The popcorn is ready if you're able to squish them with your fingers. If you can't do that, just boil a little while longer.
-
Strain and let dry. If placed on a paper towel, you want no moisture showing up.
-
Once dry, slap it in your jar.
The Jars
The type of jar you want for your grain is a mason jar. Specifically, the kind with a thin lid that is affixed to the jar with an outer metal ring. You do not want the kind with the rubber gasket.
Ideally you want a widemouthed one but it's not necessary. It will just make getting your mycelial cake out of the jar more difficult, and definitely not in one piece, so keep that in mind.
Once you have the jar you have two options:
Make a super fancy modified jar, or go lazy-mode. Personally, I''m lazy as fuck and go with an unmodified jar because it works just fine for me.
To make a modified jar you will need to drill two holes into the lid, a 1/4" hole in the centre and a 1/8" at the edge. The small edge hole will be a self healing injection port, which you want to fill with high temperature silicon sealant. For the big hole, you want to pull some poly-fill (polyester fill / fiber fill) through it.
Sterilisation
There are two ways to sterilise, oven sterilisation and proper pressure cooker/canner sterilisation. Oven sterilisation (if it can even be technically called that) is less effective and only recommended for food grade grains. If you're using rice or popcorn, you should be fine with that. I haven't had issues using this method.
Using a pressure cooker is a lot more reliable due to being able to reach those higher temperatures and allows for proper sterilisation and is a must for those non food-grade grains.
Oven Sterilisation:
-
Preheat oven to 150 C / 300 F
-
As the oven can dry out your grain, you can add a tablespoon of extra water to your jars.
-
Place some tin foil under the metal ring of your jar, and tighten it until it's finger tight (tighten only by holding the ring until it tightens no more. It should be loose enough to let excess air and moisture to escape. Otherwise jar explode.) If you have doubts, just loosen it slightly.
-
Place into over for 30 minutes.
-
After 30 minutes lower temperature to 120 C / 250 F and leave in oven for 2 more hours.
-
Remove jars and shake occasionally to distribute moisture.
-
Cool for 8 hours.
-
Ready for inoculation.
Pressure Cooker Sterilisation:
-
Read the instructions of your pressure cooker. Be safe and responsible. You don't want an IED in your kitchen.
-
Place some tin foil under the metal ring of your jar, and tighten it until it's finger tight (tighten only by holding the ring until it tightens no more. It should be loose enough to let excess air and moisture to escape. Otherwise the jar will explode.) If you have doubts, just loosen it slightly.
-
You will need to raise the jars off the bottom of the pressure cooker chamber. This is needed as placing the jars directly on the bottom can lead to uneven heating which can cause your jars to crack. If your PC comes with a trivet already, that's great, but if it does not, you can use some mason jar lids or some heat safe plates or containers. If it's something you'd use in an oven, you're good. You need to raise the jars enough so you can fit enough water. Running the PC without any water can cause your jars to explode.
-
You will want to heat the jars in the pressure cooker at 15 psi 120 C / 250 F for 90 minutes.
-
Once it is done, you want to let the PC and the jars cool to room temperature (overnight is handy). Once it's all cool, you can take out your jars for inoculation.
Inoculation
Great! You sterilised your grains, so now you're ready for the inoculation.
Location
Where you inoculate is important. You want to choose a place with little air flow and somewhere that doesn't have a lot of nasty stuff in the air. Small rooms, and corners are good. Just use your brain and intuition. The only hard NO is the bathroom. Do not do it in there, there are so many bad particulates there and you're going to have a bad time.
Items
Cleanliness and sanitation is paramount for this step so you will need some things for this process.
Basics:
-
The thing you're using to incoluate the grain (SS/LC/A2G/WHATEVER (duh))
-
Paper towels: for wiping.
-
70% isopropyl alcohol: You will need to wipe down everything. And then wipe down everything again. There can never be enough isopropyl alcohol. (Other disinfectant sprays work too.)
-
Lysol spray (or whatever brand): Good for disinfecting your surroundings.
-
Lighter: Flame sterilising your needle.
-
Still air box: keep the air flow to a minimum.
-
Latex gloves
-
Face mask
If using ready rice, you will also need:
-
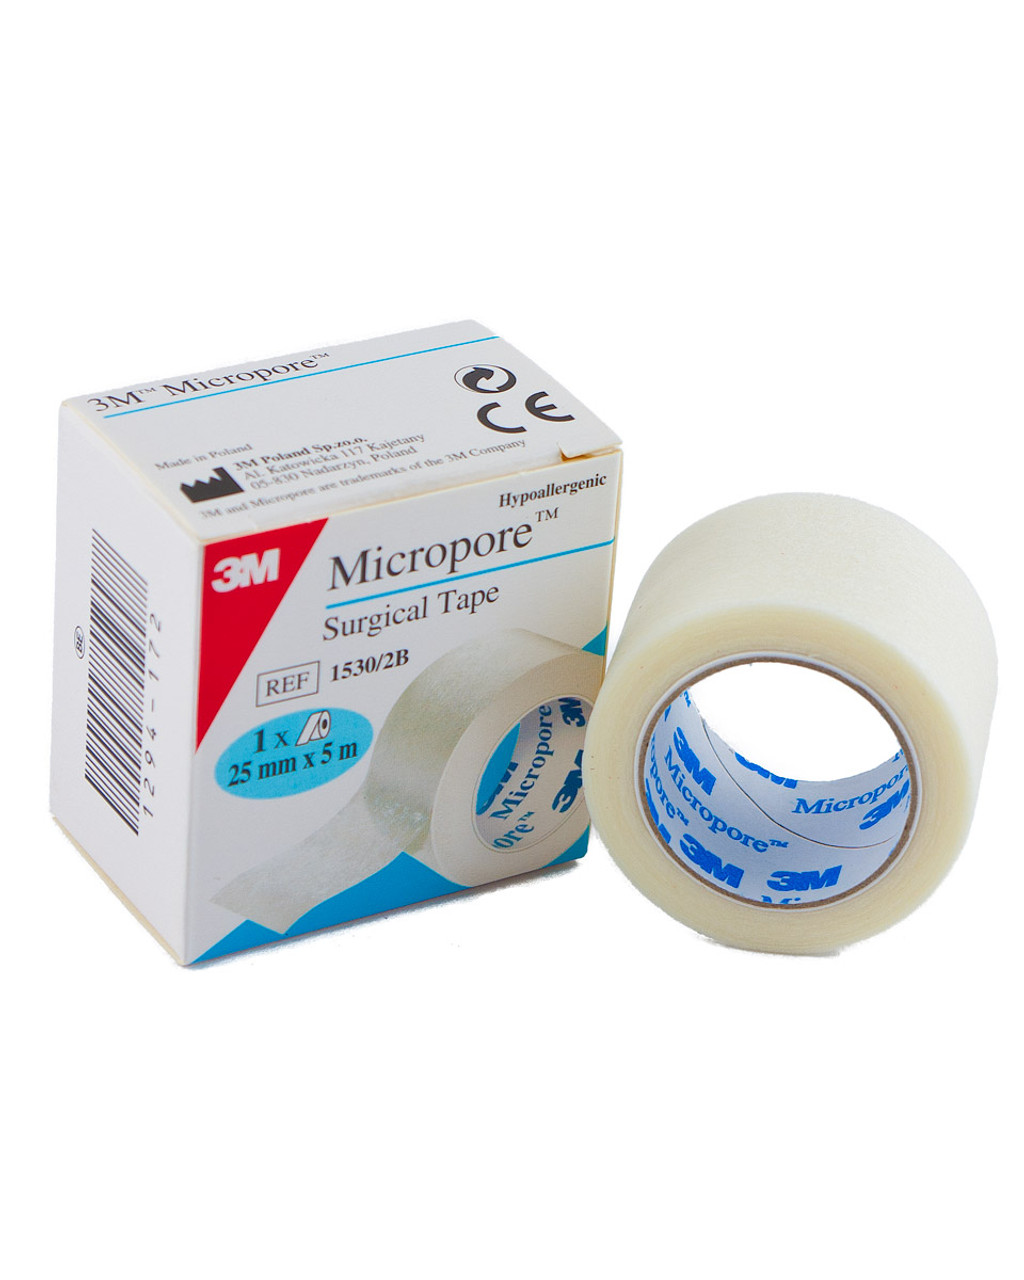
Micropore tape: Medical micropore tape will be needed for gas exchange. Can be found in pharmacies.
Still Air Box
An SAB can be as simple as working under a plastic tub. However, you can get fancy and modify a plastic tub. These modifications can be pretty simple, such as just cutting out arm holes in the side, but some people have gone the country mile and made some crazy mods. If you're loaded or already have a fully functioning lab, then you can just use a laminar flow hood, but if you're reading this, yeah, you're not gonna have one of those.
Jar Inoculation
Inoculation a jar is pretty simple. As was said before, and will be said in future. Be. Clean.
-
Allow the air in your workspace to settle for 30 mins to an hour if needed.
-
Sanitise your workspace with 70% isopropyl alcohol (or otherwise).
-
Prepare your jar and keep it ready. Wipe it down with alcohol.
-
If your jar is unmodified, loosen the lid so it can easily be lifted up.
-
Remove the lid of your syringe and flame sterilise the needle. Be mindful of getting too close to the body as you don't want to melt it. You want to flame sterilise, as alcohol only sanitises it. The fire removes ALL potential contaminants.
-
Unmodified: Lift lid and inject 0.5-0.75 CC into grain.
-
Modified: Inject 0.5-0.75 CC into grain through the injection port.
Uncle Ben Tek
Uncle Ben Tek requires some extra steps. And as was said before, and will be said in future. Be. Clean.
-
Allow the air in your workspace to settle for 30 mins to an hour if needed.
-
Sanitise your workspace with 70% isopropyl alcohol (or otherwise).
-
Carefully pack all the rice to the bottom of the bag so it is all compact as one block.
-
Sanitise/sterilise a pair of scissors.
-
You must create a GAS EXCHANGE in the bag. Cut open the corner of your bag and place a strip of micropore tape over it. You want it to be an open hole. You do not want to seal it with the tape, you want it to cover the hole like a screen. Keep the tape dry.
-
Puncture the bag with the needle in the lower centre of the grain.
-
Inject 0.5-0.75 CC into grain.
-
Seal hole with more micropore tape.
With the inoculation complete, it's time to wait for your mycelium to grow!
Colonisation
Location:
For your grain spawn to colonise, you want to keep it in a cool, clean, and dark area out of sunlight. Somewhere out of the way with little foot traffic, minimise air flow. This could be high up on a shelf out of the way, or in a closet or utility room or whatever. What's also good is to just keep your jars or bags in the tubs that you want to eventually grow your mushrooms in.
Temperature:
Different mushrooms have different temperatures they prefer so you will have to look up the ideal colonisation temperatures for what you're growing. For example, pioppinos enjoy temps from 13-18 C and high humidity whereas the ideal temperature for oyster mushrooms is at 17-25 C.
If you're growing in the winter you might have to provide some heating to keep things at the right level.
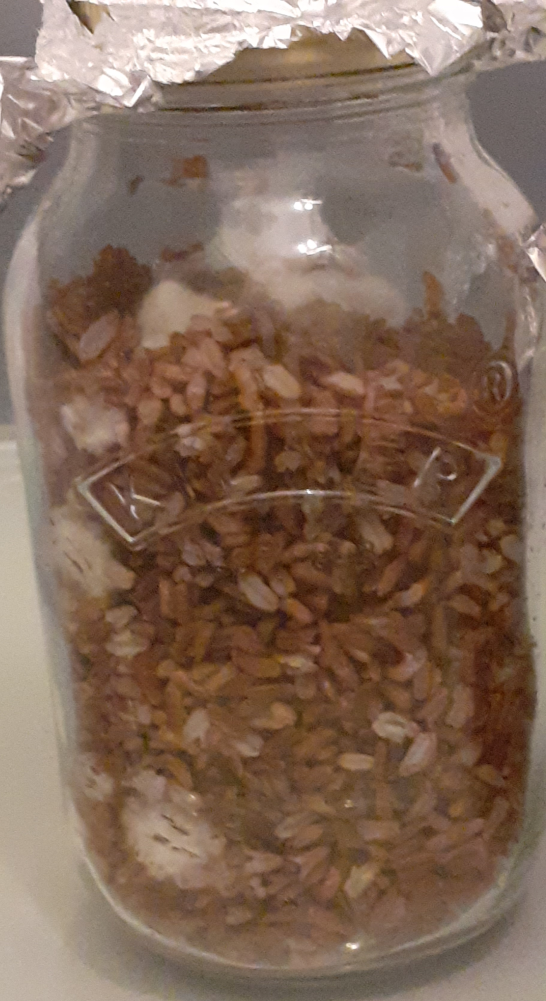
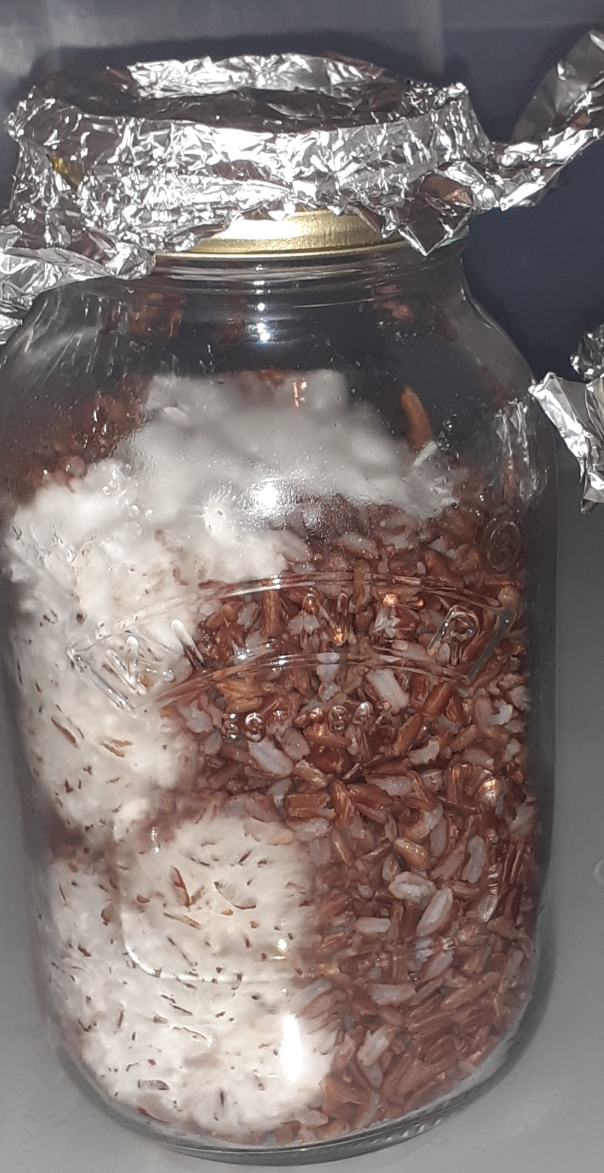
Growth:
Growth should be a solid white. If there's green or black, it's a goner.
Break and Shake:
Once your grains are 20%-50% colonised you may want to "break and shake". This just means that you will break up and distribute the colonised grains throughout. This speeds up the colonisation process as it provides new points of growthall over your grain, rather than situated as a singular core.
With a jar the best method is to slap the jar against your palm to break up the clump of mycelium.
With a bag it's as simple as squishing the clump and distributing the mycelium throughout. The only precaution you need to take is for no rice to go near the gas exchange.
Full Colonisation:
If everything has gone smoothly, you should now have a fully colonised jar or bag of grain spawn! This is now ready to be spawned to bulk, or fruited directly from the mycelial block.
Spawning to Bulk
Spawning to bulk refers to the idea of mixing your grain spawn with a substrate. The function of this is to provide moisture,surface area for fruiting, and in some cases nutrition.
There are a variety of substrates you can use. Some of these materials are used on their own, while others must be mixed in with another. What's best for you depends on what you're growing. A lot of it comes down to experimentation too, seeing what works for you.
Substrate materials:
-
Coco coir
-
Vermiculite
-
Coffee Grounds
-
Hardwood Pellets
-
Straw
-
Logs
-
Manure
-
Cardboard
(Gypsum can be mixed in with some substrates)
One common combination is a CVG mixture combing coco coir, vermiculite and gypsum. In any case, each of these substrates have different method of preparation. Here I will only be describing the process of using coco coir as it is one of the easier and more straightforward substrates.
Regardless of substrate, you have to pasteurise it and kill any yucky things inside.
Preparing Coco Coir:
-
Get a bucket and clean it.
-
Put your brick of coco coir inside.
-
Boil water and pour onto coir.
-
Cover and let sit for some hours until it cools.
Spawning to bulk:
For this process you may want to use a liner. There's some varied opinions on what a liner does in terms of sunlight and other things, but what it does do is help reduce side pinning during the fruiting phase as it sticks to the cake, and also makes it easier to remove your mycelial cake from the container for harvesting or rehydration.
What I use as a liner is simply a plastic bin bag cut into a shape that fits the container.
Spawning to bulk is not particularly complex or exact and there's different ways of doing this. I find this way the simplest and easiest.
-
Clean whatever container you are using for growing.
-
If using a liner, spritz the sides of your container with water. This will help the liner to stick to the container, making it easier to work with. Then place in your liner.
-
Place a roughly 1 inch layer of coir into your container.
-
Break apart your grain spawn and distribute it evenly across the coir.
-
Cover this in another layer of coir. This should be thinner and just there to cover your grain(don't make it an inch thick).
-
Flatten everything as much as possible.
After this you want to leave the substrate to colonise. Much like how you colonised your grain, you want the container to be sealed while still allowing for gas exchange. This could involve adding holes with micropore tape to your containers lid, or if the lid isn't airtight, simplykeeping that lid on top would be fine. Same things apply in regards to location and temperature.
Once colonised you may want to add a casing layer, although it is not necessary. This involves adding another layer of coir for the fruiting stage. It helps retain moisture and aids in providing adequate fruiting conditions. Some mushrooms prefer casing layers more to others.
Fruiting
The final stage!
At this point, it is time to induce fruiting conditions. Mushrooms don't just start growing willy nilly. They only start growing if they sense the right weather conditions, which in a home growing environment, we need too induce ourselves. How they recognise the need to fruit is when water evaporates off the surface of your cake/casing layer. This means an adequate balance of moisture, temperature and air flow.
Ideal fruiting temperatures may differ to colonising temperatures for your mushroom of choice, so look up what that may be.
As always, there are many ways to go about this. Professional growers or advanced hobbyists have some crazy setups that automatically gauge humidity and dispense water. If only we were so lucky to have that. Today we're going very simple.
While providing moisture there are some things you must take into account. The way in which you apply the moisture is important as it is possible to hurt your mycelium. If the water droplets are too large you can bruise your cake, as well as flattening it and causing a weird film to start growing over it. As a result you will want a misting spray bottle rather than a regular spray bottle as the water droplets are smaller and won't damage things. Also, when applying you don't want to spray directly, but rather spray above it and let the mist fall onto it.
When spraying, you want to have the water create small little mist droplets on the surface of the cake. What you don't want is pools to start forming as that is too much water and can damage the mycelium. You will want to reapply water regularly. How regularly depends on how fast the water is evaporating.
You want to provide fresh air exchange (FAE) during fruiting. This helps facilitate the evaporation of moisture, as well as gives the mushrooms air to breathe, as like animals, mushrooms take in air and produce CO2 in turn. You want FAE to push that CO2 out. There are various ways you can provide FAE.
Bag with holes.
Put holes in lid.
The easiest is simply flipping your lid over, slightly ajar.
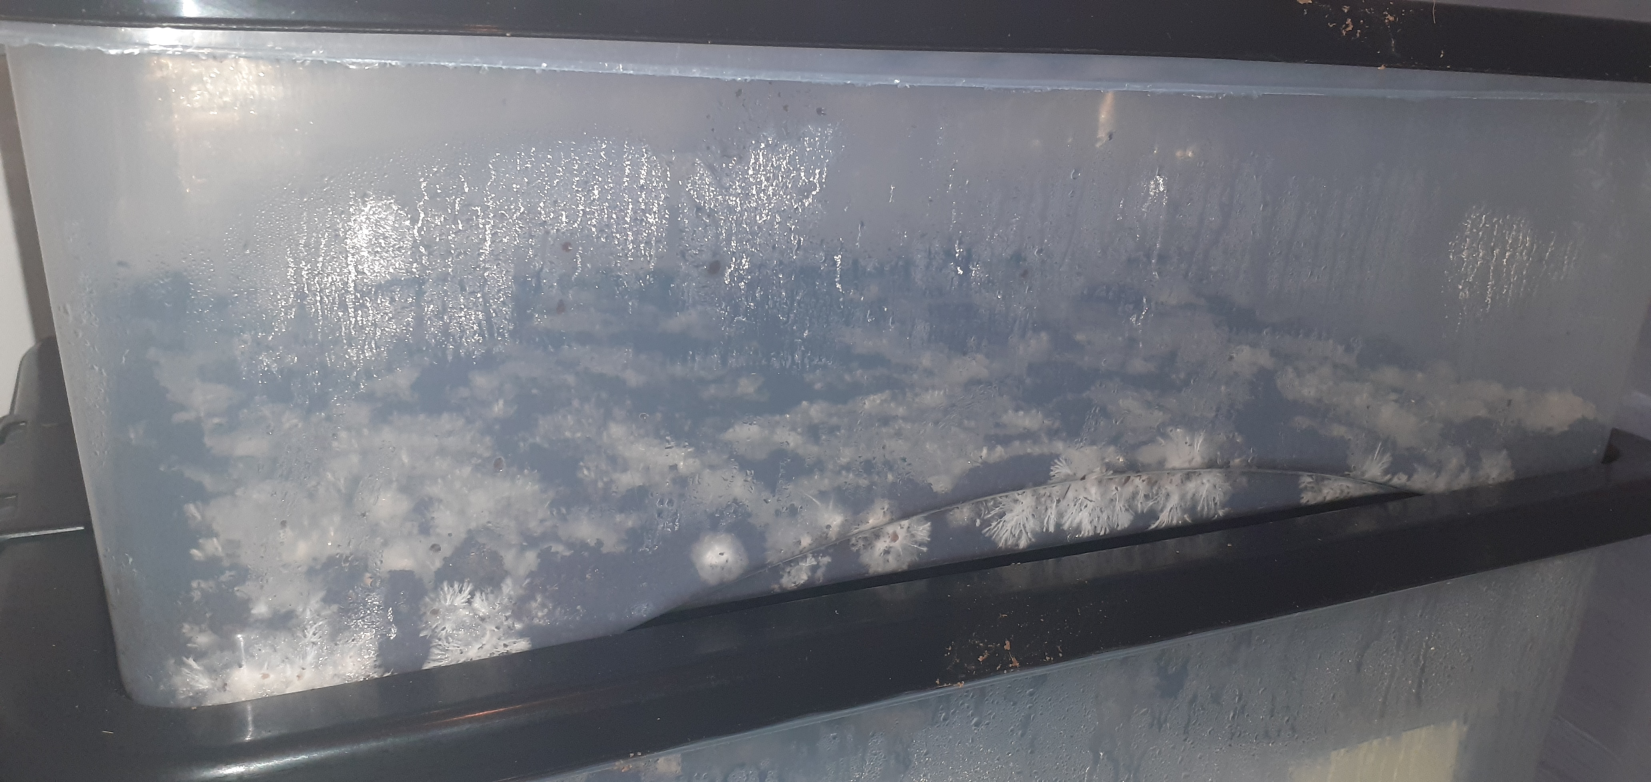
If during your grow, your mushrooms have a fuzzy base, you want to increase your FAE. It is a sign they aren't getting enough. You do not want to overdo FAE though as your grow is still susceptible to contamination.
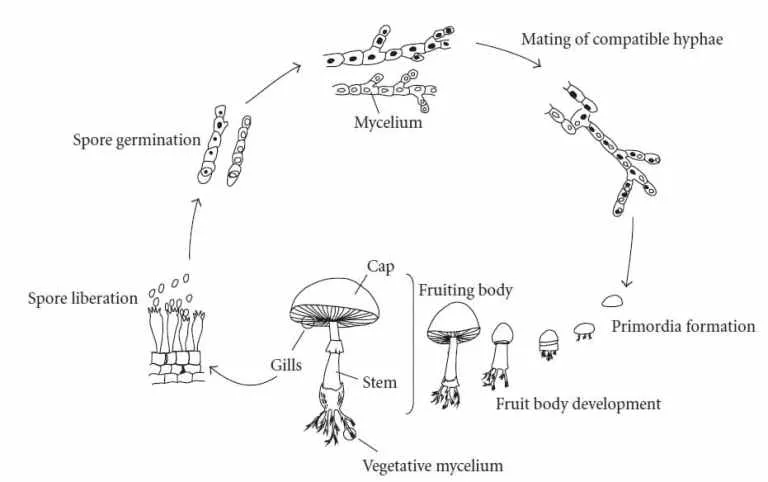
As for the actual stages of growth are, first you will see hyphal knots form. These are small little nodules that appear on the surface. These will then grow into pins which are the little baby tiny mushrooms. These will then grow out into full mushrooms if everything goes well.
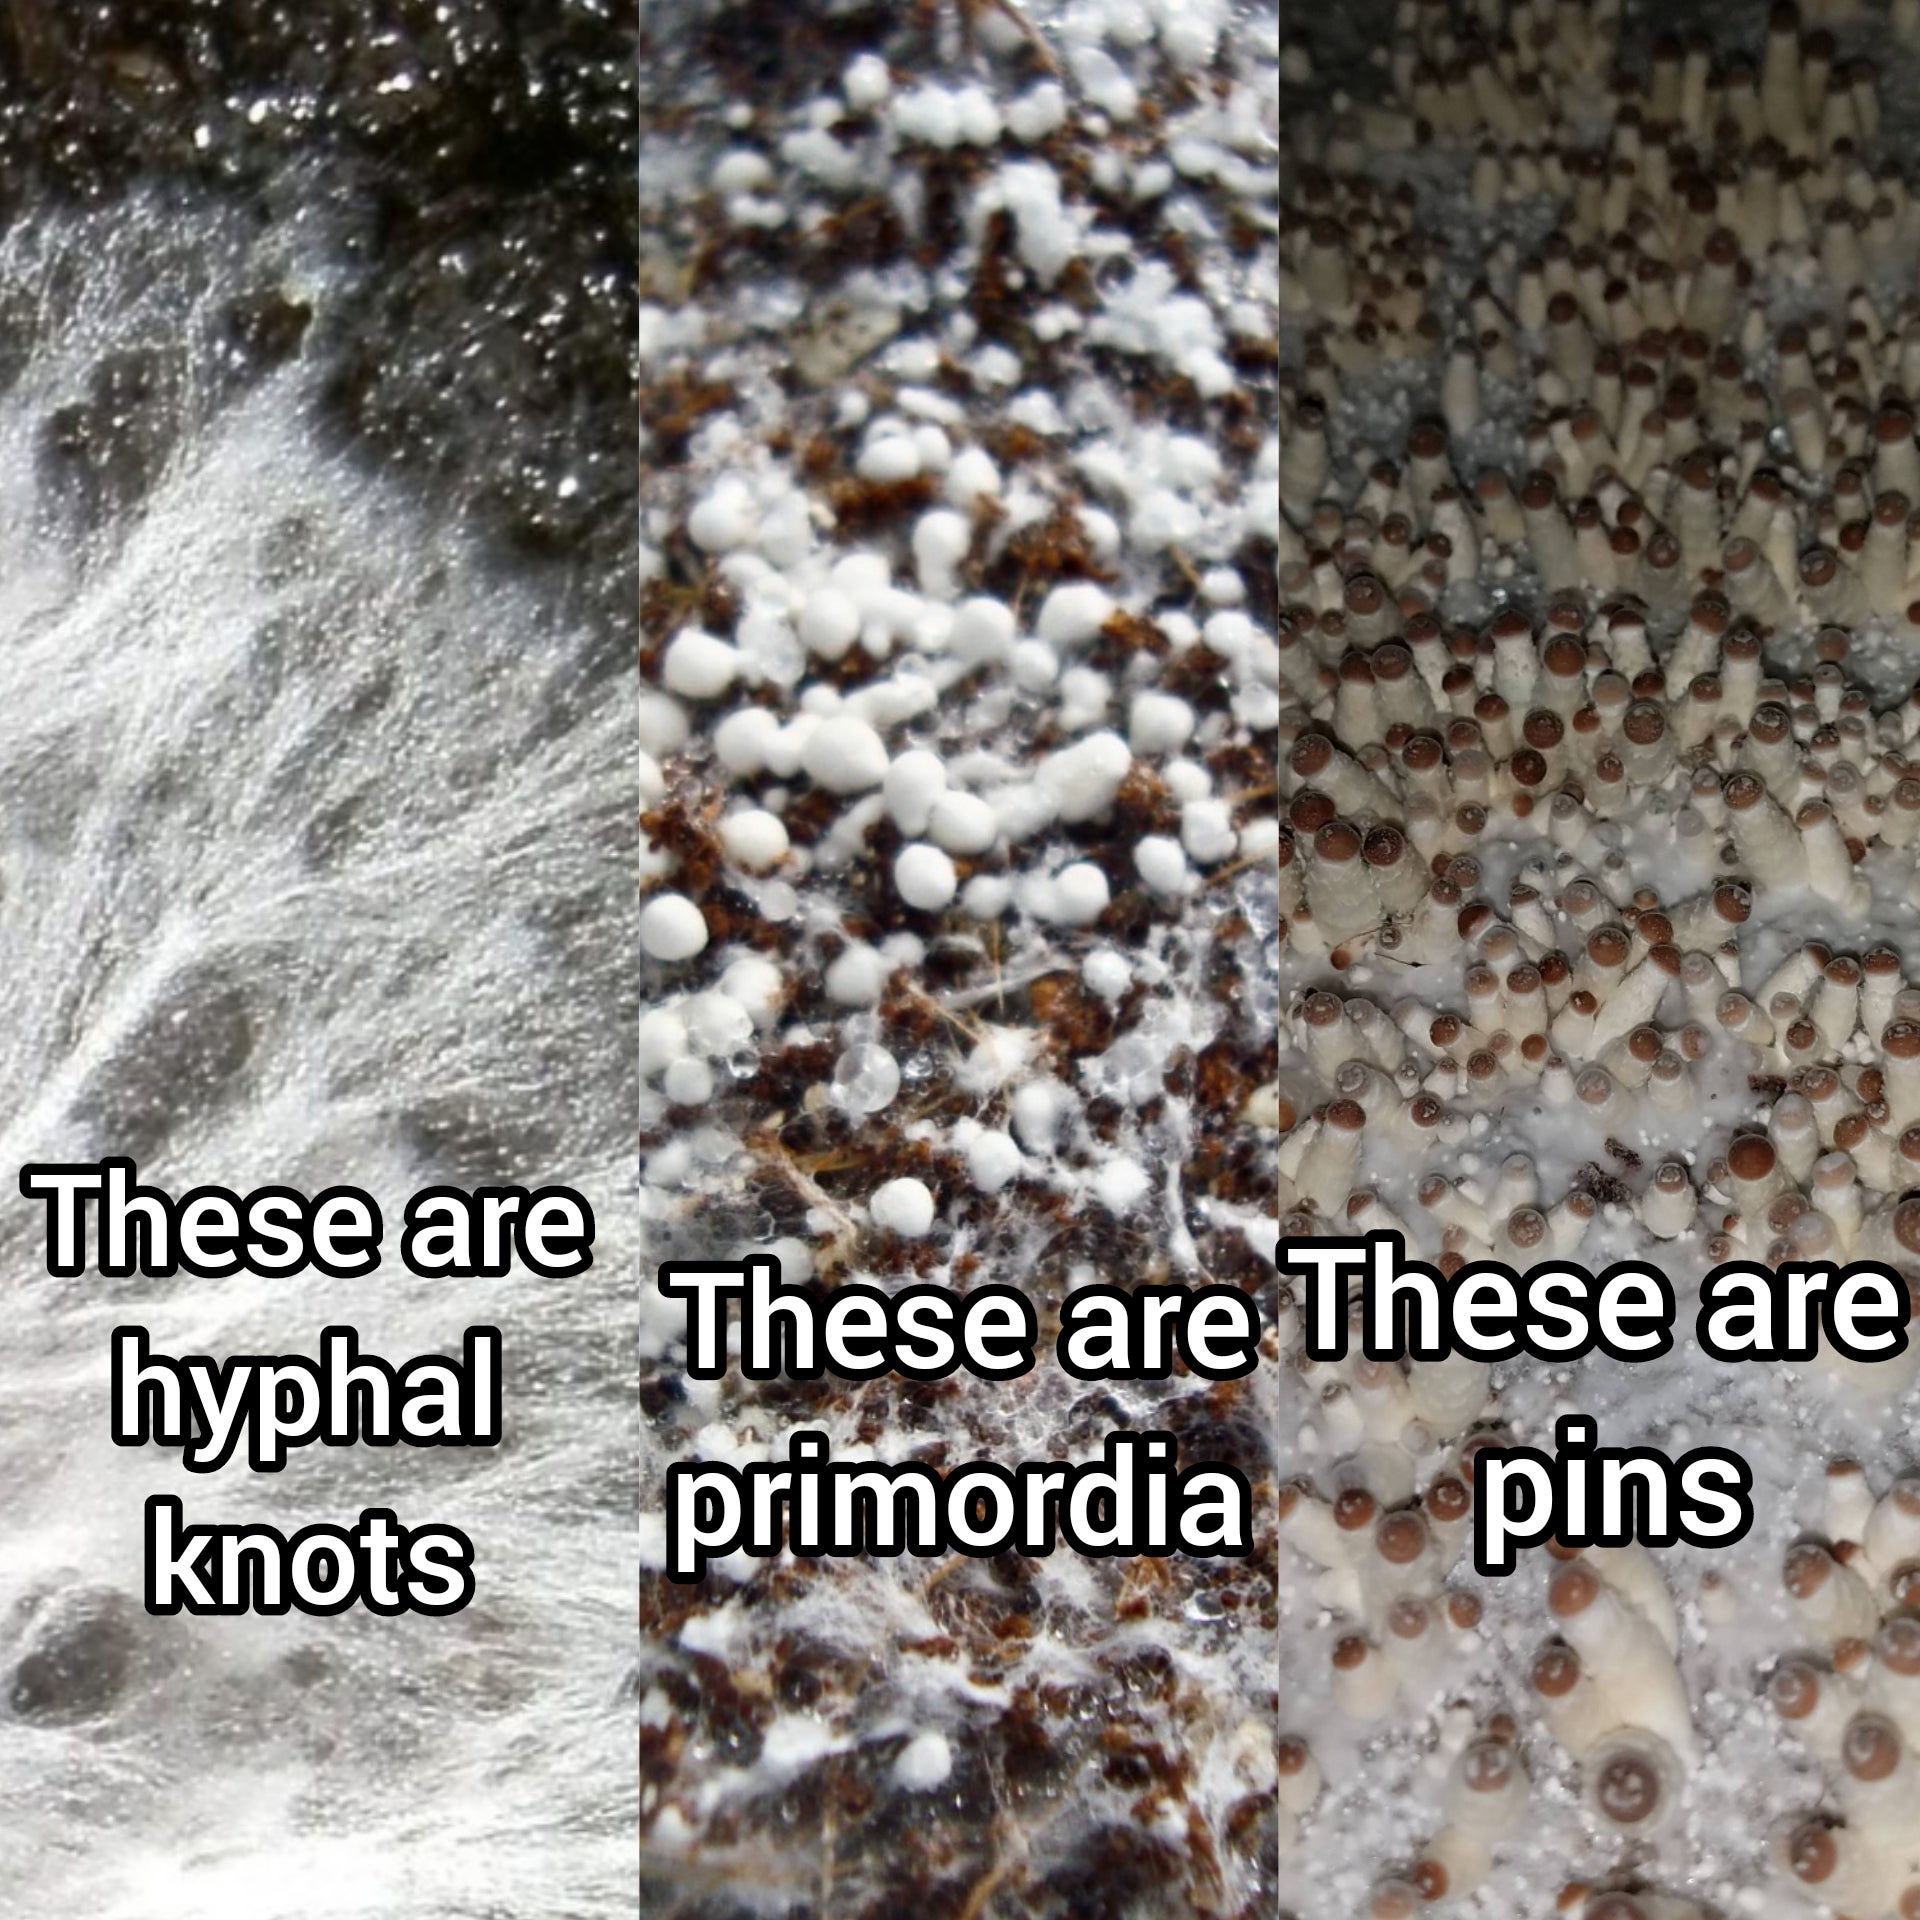
I am not above stealing random images off of google
Harvesting
You ideally want to harvest your mushrooms before they release their spores. On the underside of the mushroom cap (if that's the kind of mushroom you're growing, there will be a thin veil. The ideal point of harvesting is right before it starts to fall off.
To harvest, you can simply twist and pull off the mushrooms, or use a knife or scissors to cut them off. You do not want to leave any of the stem as it can begin to rot if left.
Subsequent Flushes
It's not over yet! After your first harvest you can rehydrate your cake and induce fruiting conditions again. To do this you have to submerge the cake in water for 5-8 hours. Enjoy more mushies!
Yahoo!!!!!!!!!!!!!!
You have yourself a nice haul of delicious mushrooms!!!!
Cook em up, save em for later, dehydrate em, do what you will.
Links
Crime Pays But Botany Doesn't (Has some good videos on mycology)
Mushrooms Demystified (Great book on mycology)
90 Second Mycology (Great channel for mushroom cultivation)
Shroomery Thread (Compilation of various types of contamination with image examples)